My nickname is Mimi, which I have been called by my close family and friends for many years. This apple pie is a version of my mom’s Apple Pie recipe, which was a two-crust pie. I started making my pie with a crumble topping because I thought the pie tasted less “doughy” and the crunch of the baked topping is just the best! In our family, this apple pie is a “must make” for the holidays and my husband’s birthday.
The key to the best apple pie is to use Spy apples. Spy apples are not widely known and are considered the “gold standard” for pies. Spy apples can sometimes be difficult to find, as they are grown mostly in the cooler, northern climates, including Michigan and New York state. They are in season in mid-to-late Fall, generally starting in October. If Spy apples are not available in your area, use any firm, slightly tart apple, such as Granny Smith.
Pro Tip: When you can find Spy apples, buy extra and freeze them. Yep! Freezing apples is totally fine and ensures that you have extra apples when apple season is over and you want to bake an apple pie. Peel and slice the apples as if you were going to use them right away. Stuff as many apples as you can in a quart freezer bag and zip it shut. Put the bags in the freezer. One quart-sized bag of apples will make one pie. When ready to make an apple pie, microwave the bag for about a minute just to loosen the apples, then proceed with making the pie. There is no need to completely thaw the apples before making the pie.
Also, I used to make my own pie crust, but found over time, that Pillsbury Pie Crusts (red box in the Refrigerator section of your grocery store) makes a decent crust that many people cannot tell is not homemade (and don’t tell them otherwise!). This is a real time saver when you are making several pies at a time. If you only make one pie, the remaining pie crust can be frozen for later use. If you prefer to make your own crust, please do!
Important: Preheat oven to 400 degrees before starting to assemble this pie. This high temperature ensures that the bottom of the pie crust cooks thoroughly and is crisp, not doughy.
Special Equipment Needed:
9 inch pie plate, glass preferred
Microplane for grating fresh nutmeg (if using)
Ingredients for the Apple Pie Filling:
- 6-8 Spy apples – peeled, cored and sliced thin (about 1/8” thick). There should be approximately 6 -7 cups of apples for a nice, full 9 inch pie. Taste the apples before proceeding. Pay attention to how juicy the apples are and how sweet or tart. This will help determine how much flour and sugar to use in the next steps.
- 3-4 level TBSP all purpose (AP) flour. If the apples are juicy, use 4 TBSP.
- ½ – ¾ cup granulated sugar. If the apples are tart, use 3/4 cup of sugar or to your taste.
- 2 tsp ground cinnamon
- ½ – 1 tsp ground nutmeg If you don’t like nutmeg, just omit. If using, be careful not to over measure this spice, as it can be quite overpowering. One other note, I find that using fresh nutmeg provides the best flavor. Use a micro plane and grate as much or as little as you like. The “nut” of the whole nutmeg can be stored in a small container in the freezer to use whenever needed next.
Ingredients for Crumb Topping:
- ½ cup (rounded) flour
- 1/2 cup (rounded) rolled or quick cooking oats. I like Quaker brand. (Do not use instant oatmeal in the packets.)
- ½ – ¾ c. brown sugar, packed. If the apples are on the sweeter side, use less brown sugar.
- 6 TBSP butter, chilled, cut into pieces or thin slices to help mix better
- 1 tsp cinnamon
Ingredients for the Crust:
1 prepared pie crust, at room temperature for easy rolling out.
Directions to assemble the pie:
- Unroll the pie crust and place over a 9 inch pie plate. Crimp the edges of the pie dough all around the edge of the pie plate. Cut off excess pie dough.
2. Place the ingredients for the apple pie filling, starting with apples, in a large bowl. Stir to coat apples with flour, sugar and spices. Place into the unbaked pie crust and spread to distribute the apples evenly over the crust.
3. Place the crumb topping ingredients in the same bowl used for the apple filling. Then using a pastry blender or fork, mix well to combine. The butter should be a little visible in the crumb topping, about the size of a pea.
4. Spread the crumble topping evenly over the apples and gently pat to stay in place. It is OK if all of the apples around the edges are not completely covered with the crumb topping.
5. Place the pie on the center rack in the pre-heated oven. You may want to set the pie plate on a cookie sheet, in case the juices boil over when baking.
6. Lay a piece of aluminum foil lightly over the top of the pie. This helps to keep edges of crust from burning.
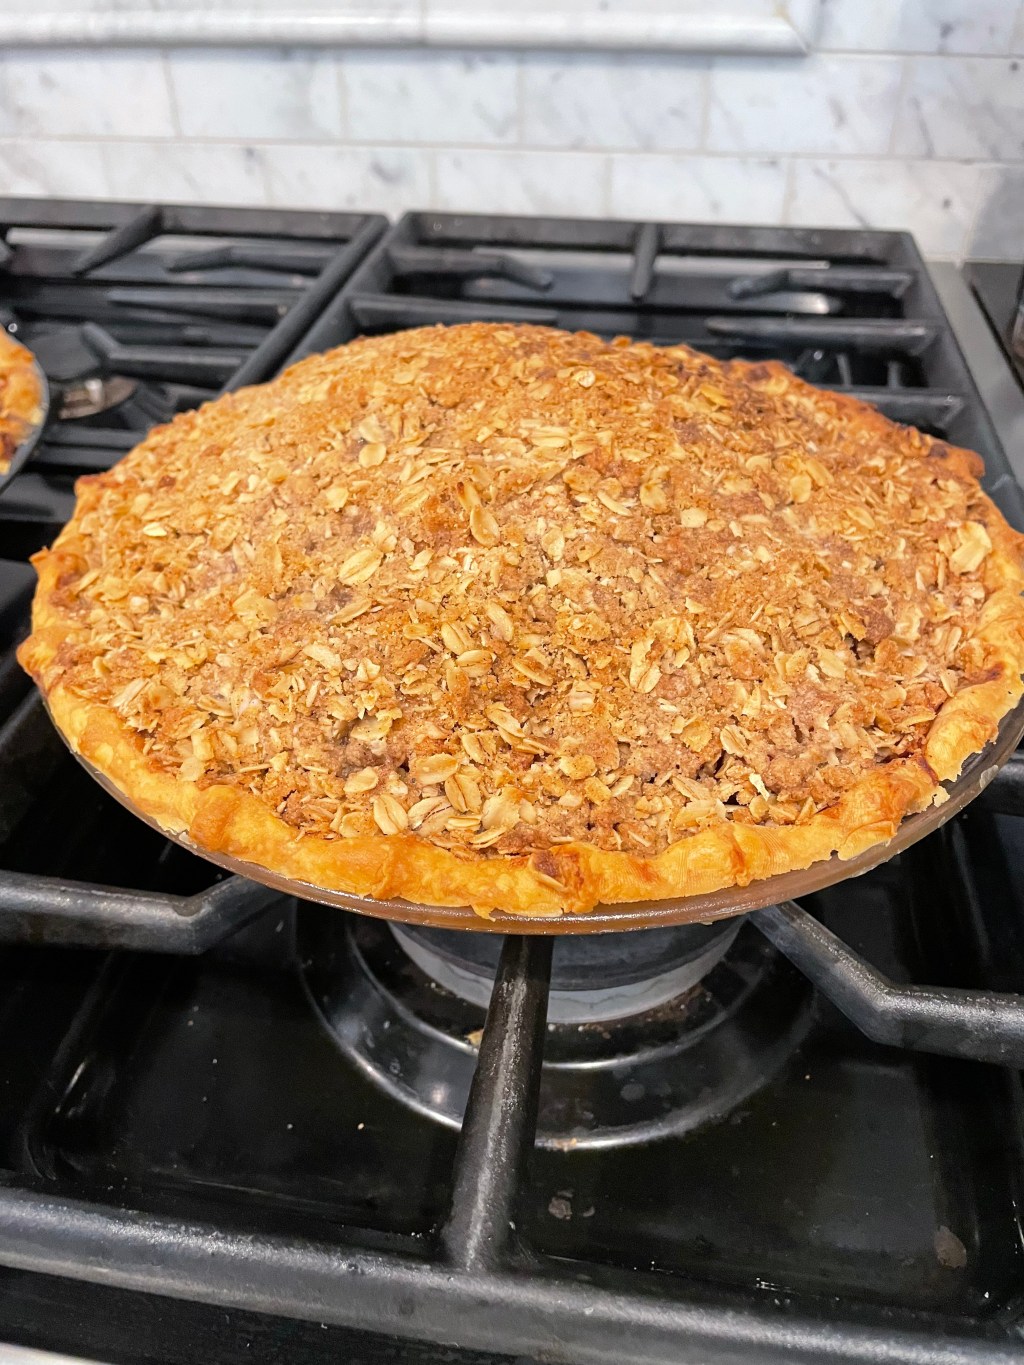
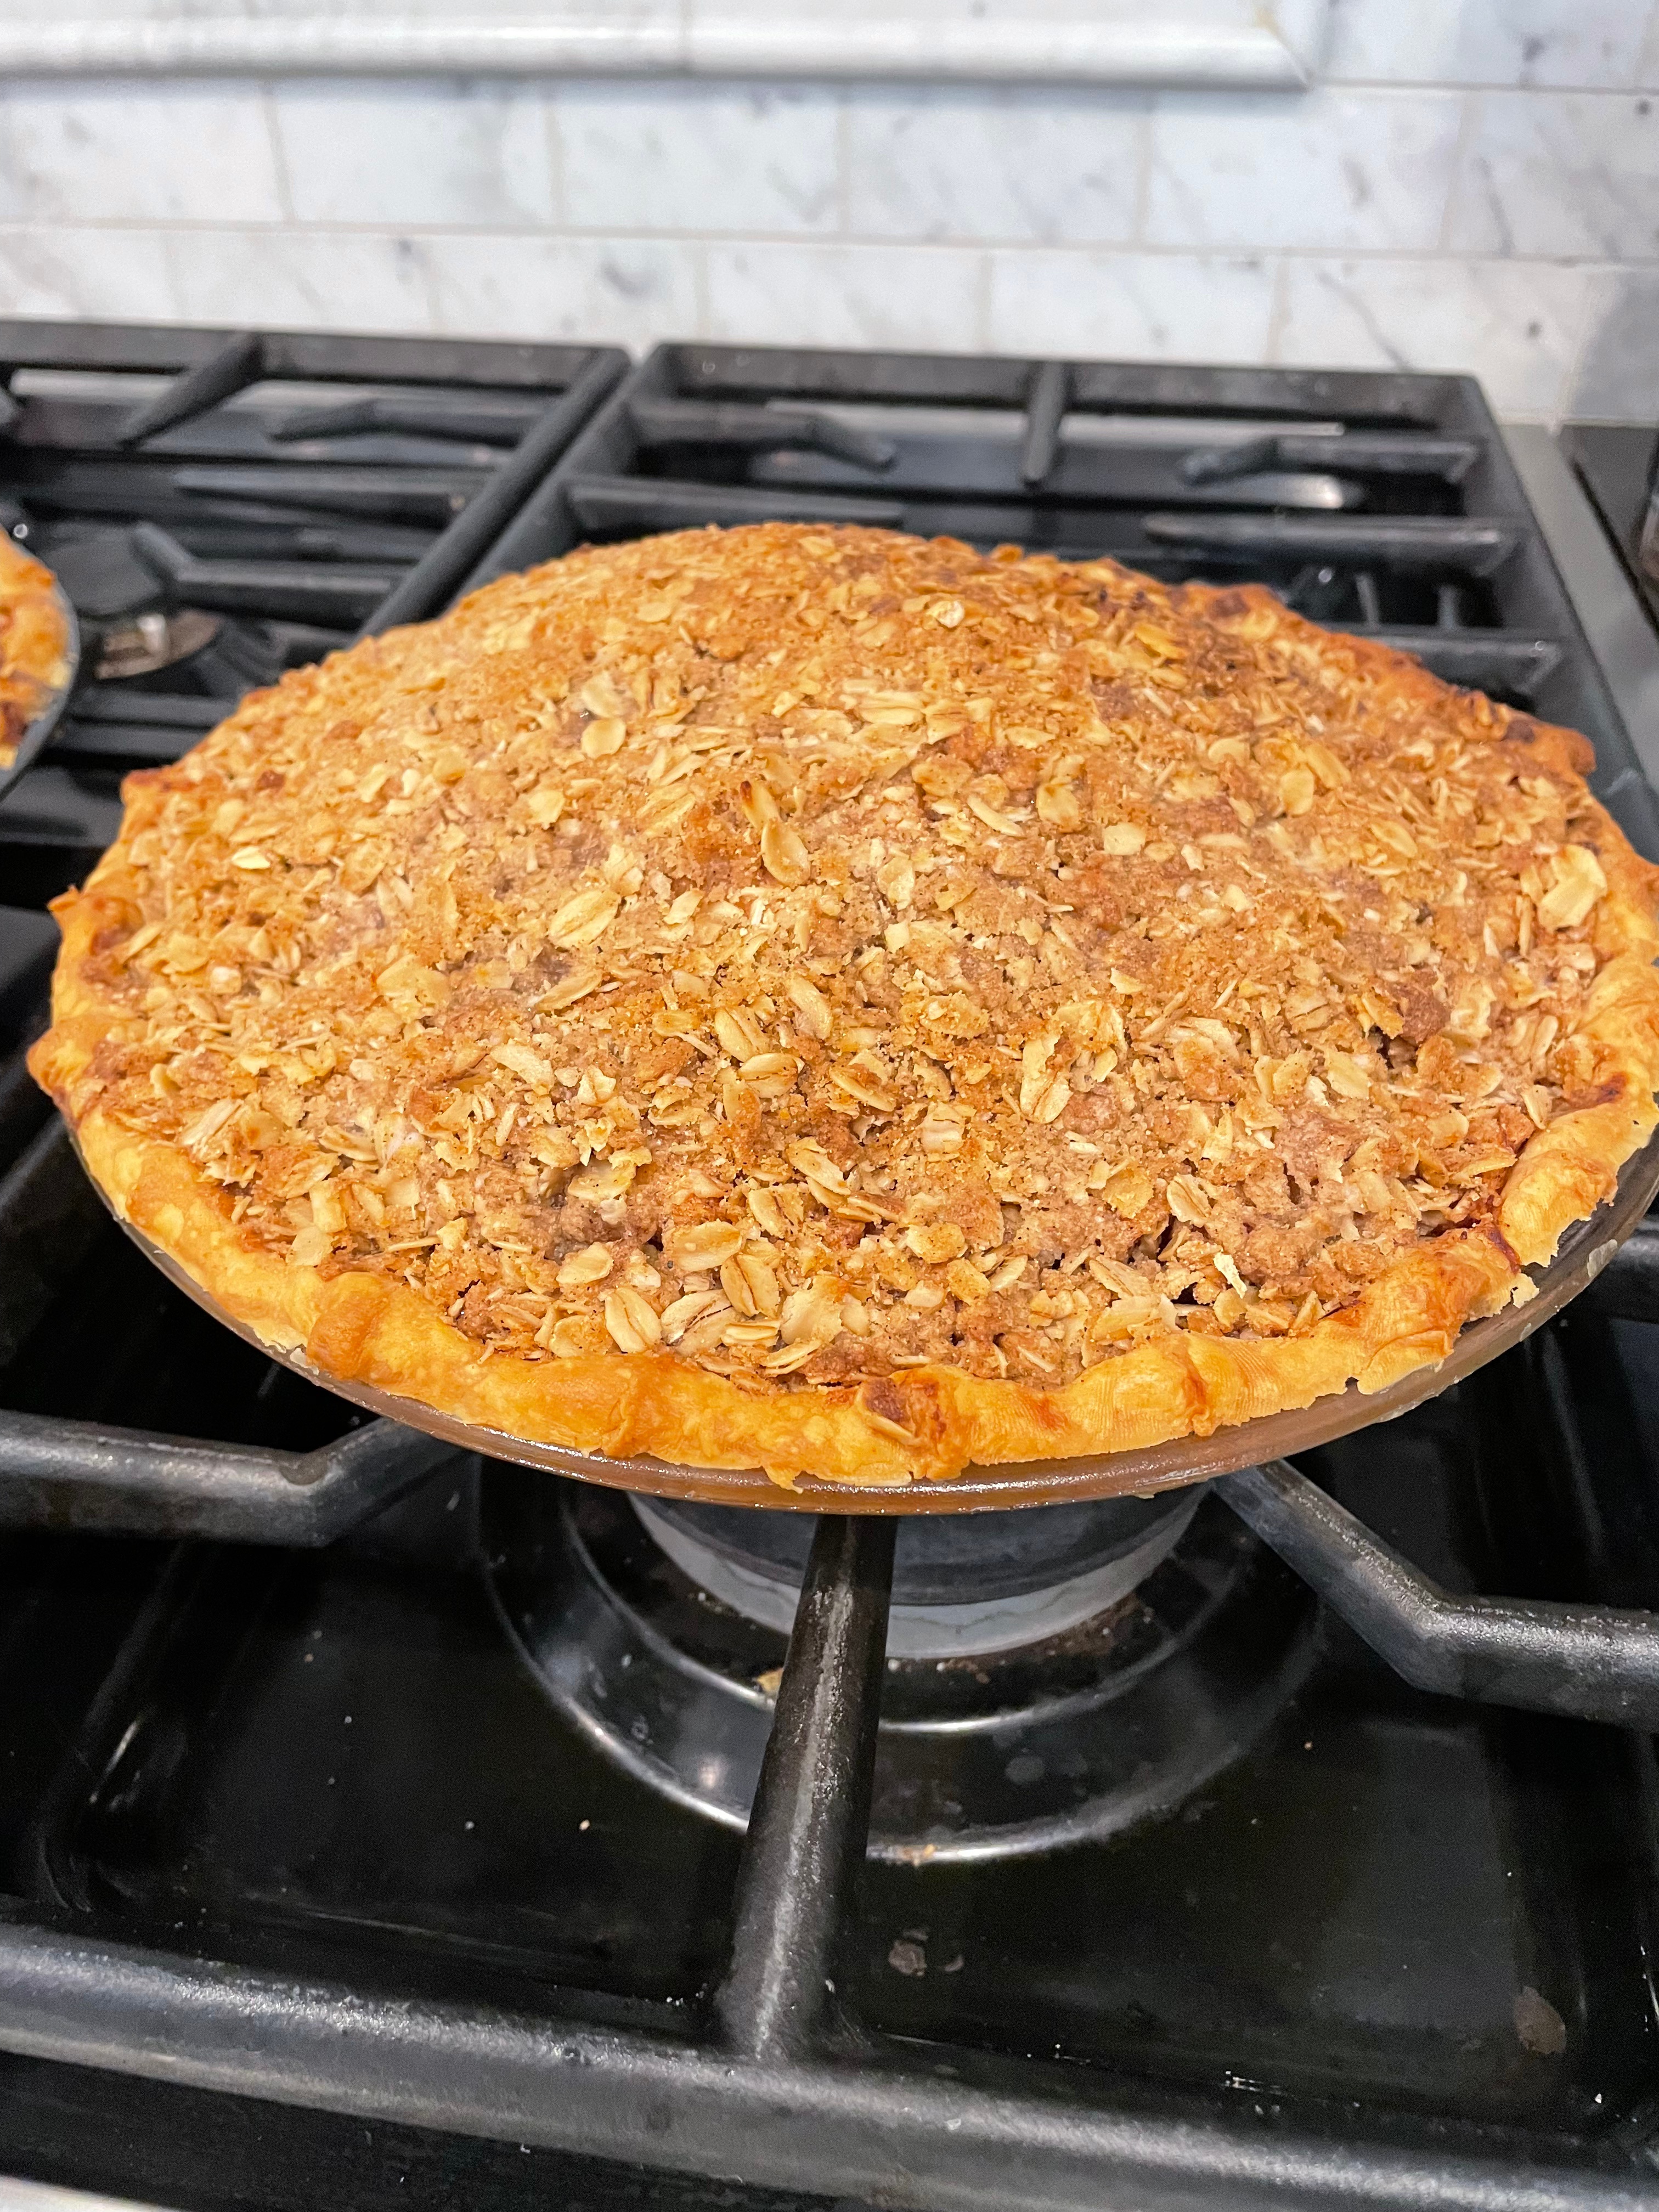
7. Bake for approximately 50 minutes.
8. Begin to check for the juices to bubble around the edges of the pie at about 40 minutes. If the juices of the pie are not bubbling around the edge of the pie, let it bake another 10 minutes.
9. Remove the pie when the crumb topping is nicely golden brown and the juices are bubbling around the edges of the pie.
10. Place baked pie on a wire rack to cool.
Serving suggestion: Serve with ice cream (vanilla is always our go-to) or homemade whipped cream.
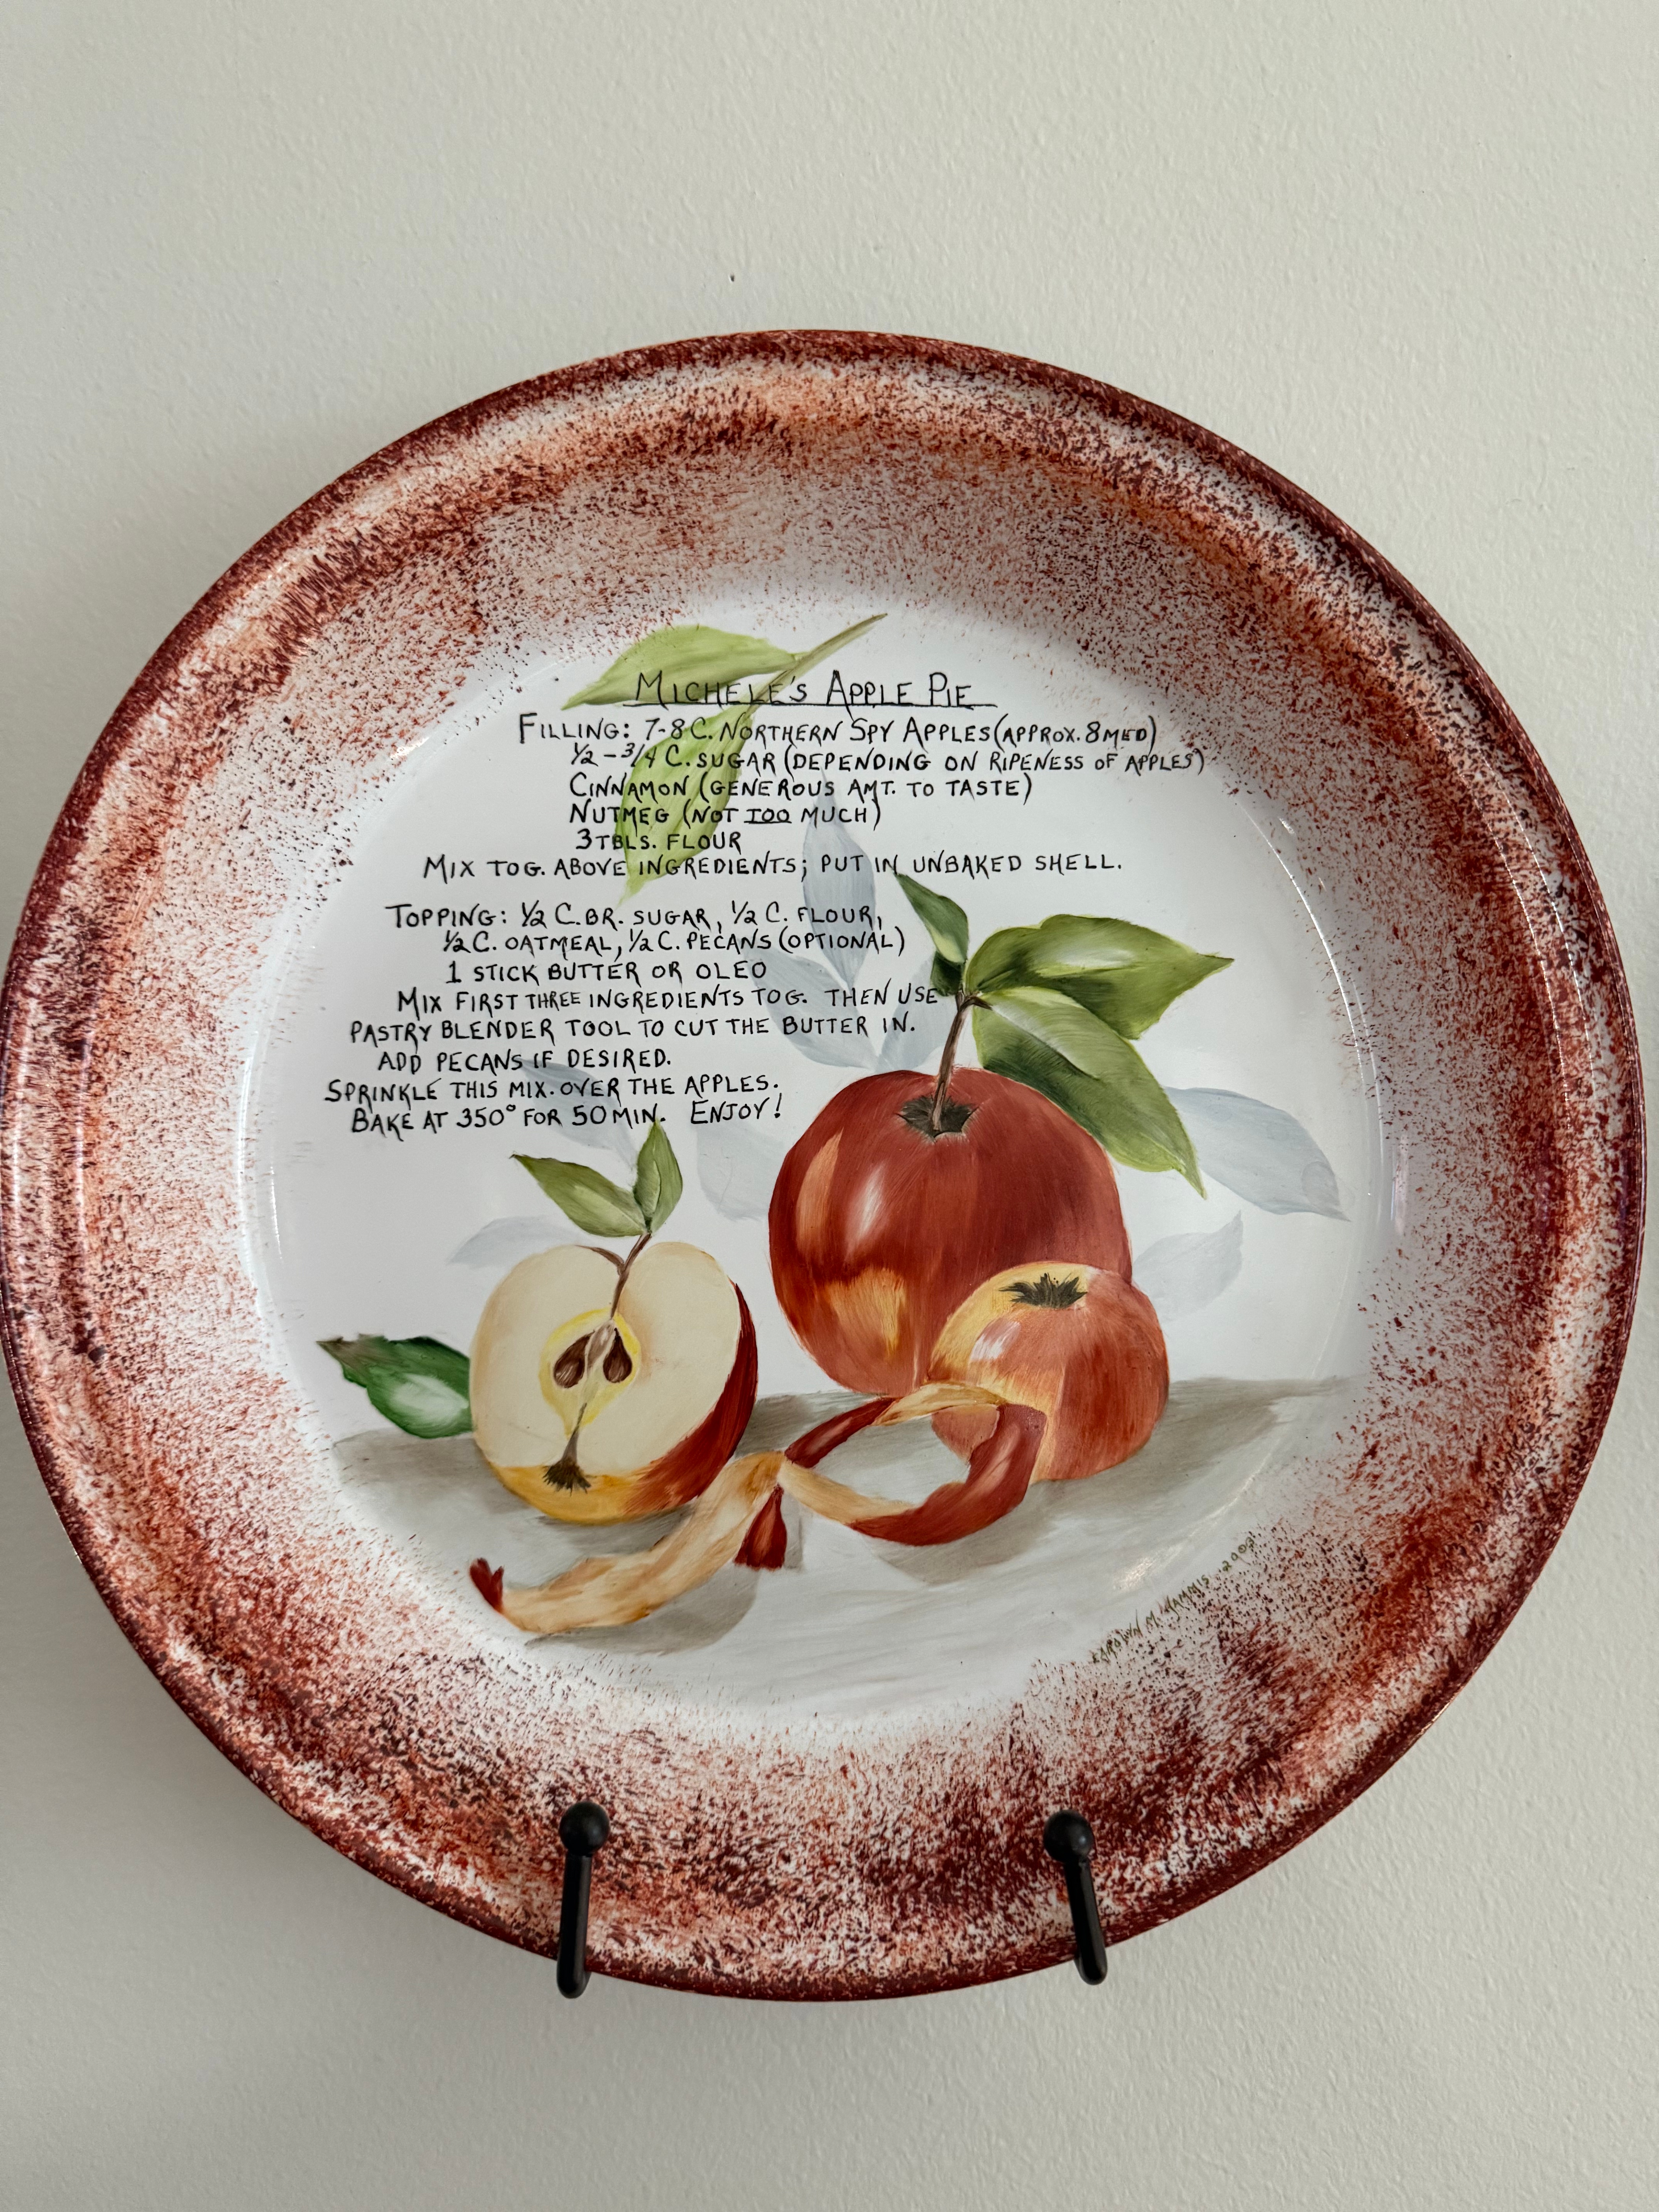
One last memory to share: After several years of baking this apple pie, my brother Don and his (now late) wife, Cindy, asked her mother, Carolyn Hammis, to hand-paint a ceramic pie plate with my recipe lettered in the middle of the plate. I received this cherished gift one year at Christmas. My dear sister-in-law passed away after a hard and long fight with breast cancer several years ago. Just recently, Carolyn passed away as well. The recipe has evolved a little over the years, but this heartfelt gift will ensure that I will never forget either one of these beautiful ladies.