
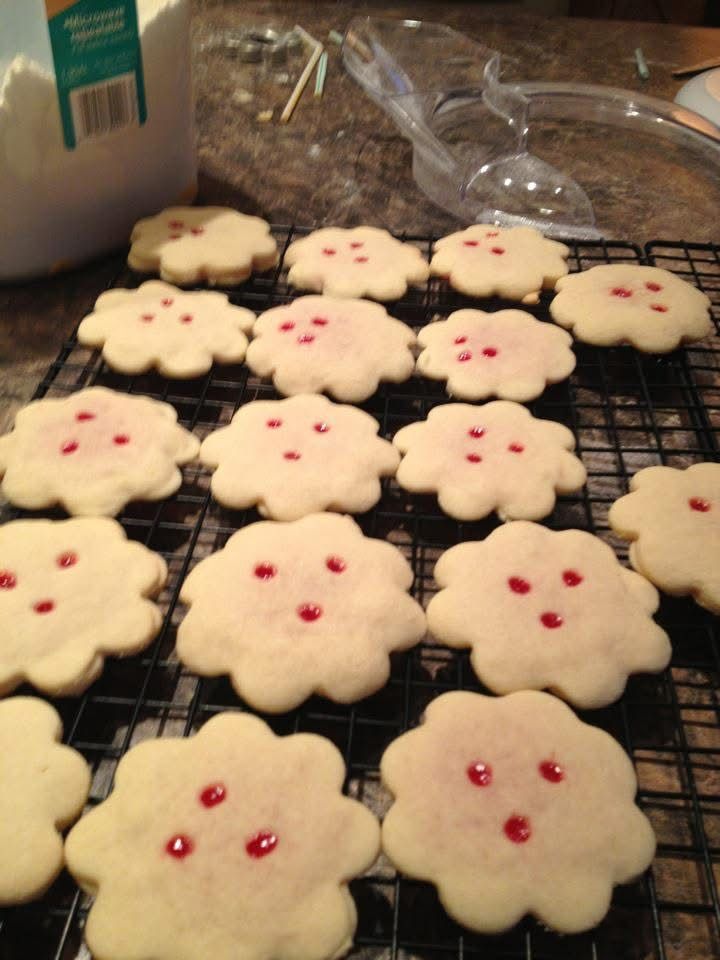
Top photo: Poinsettia Cookies courtesy of my brother, Don.
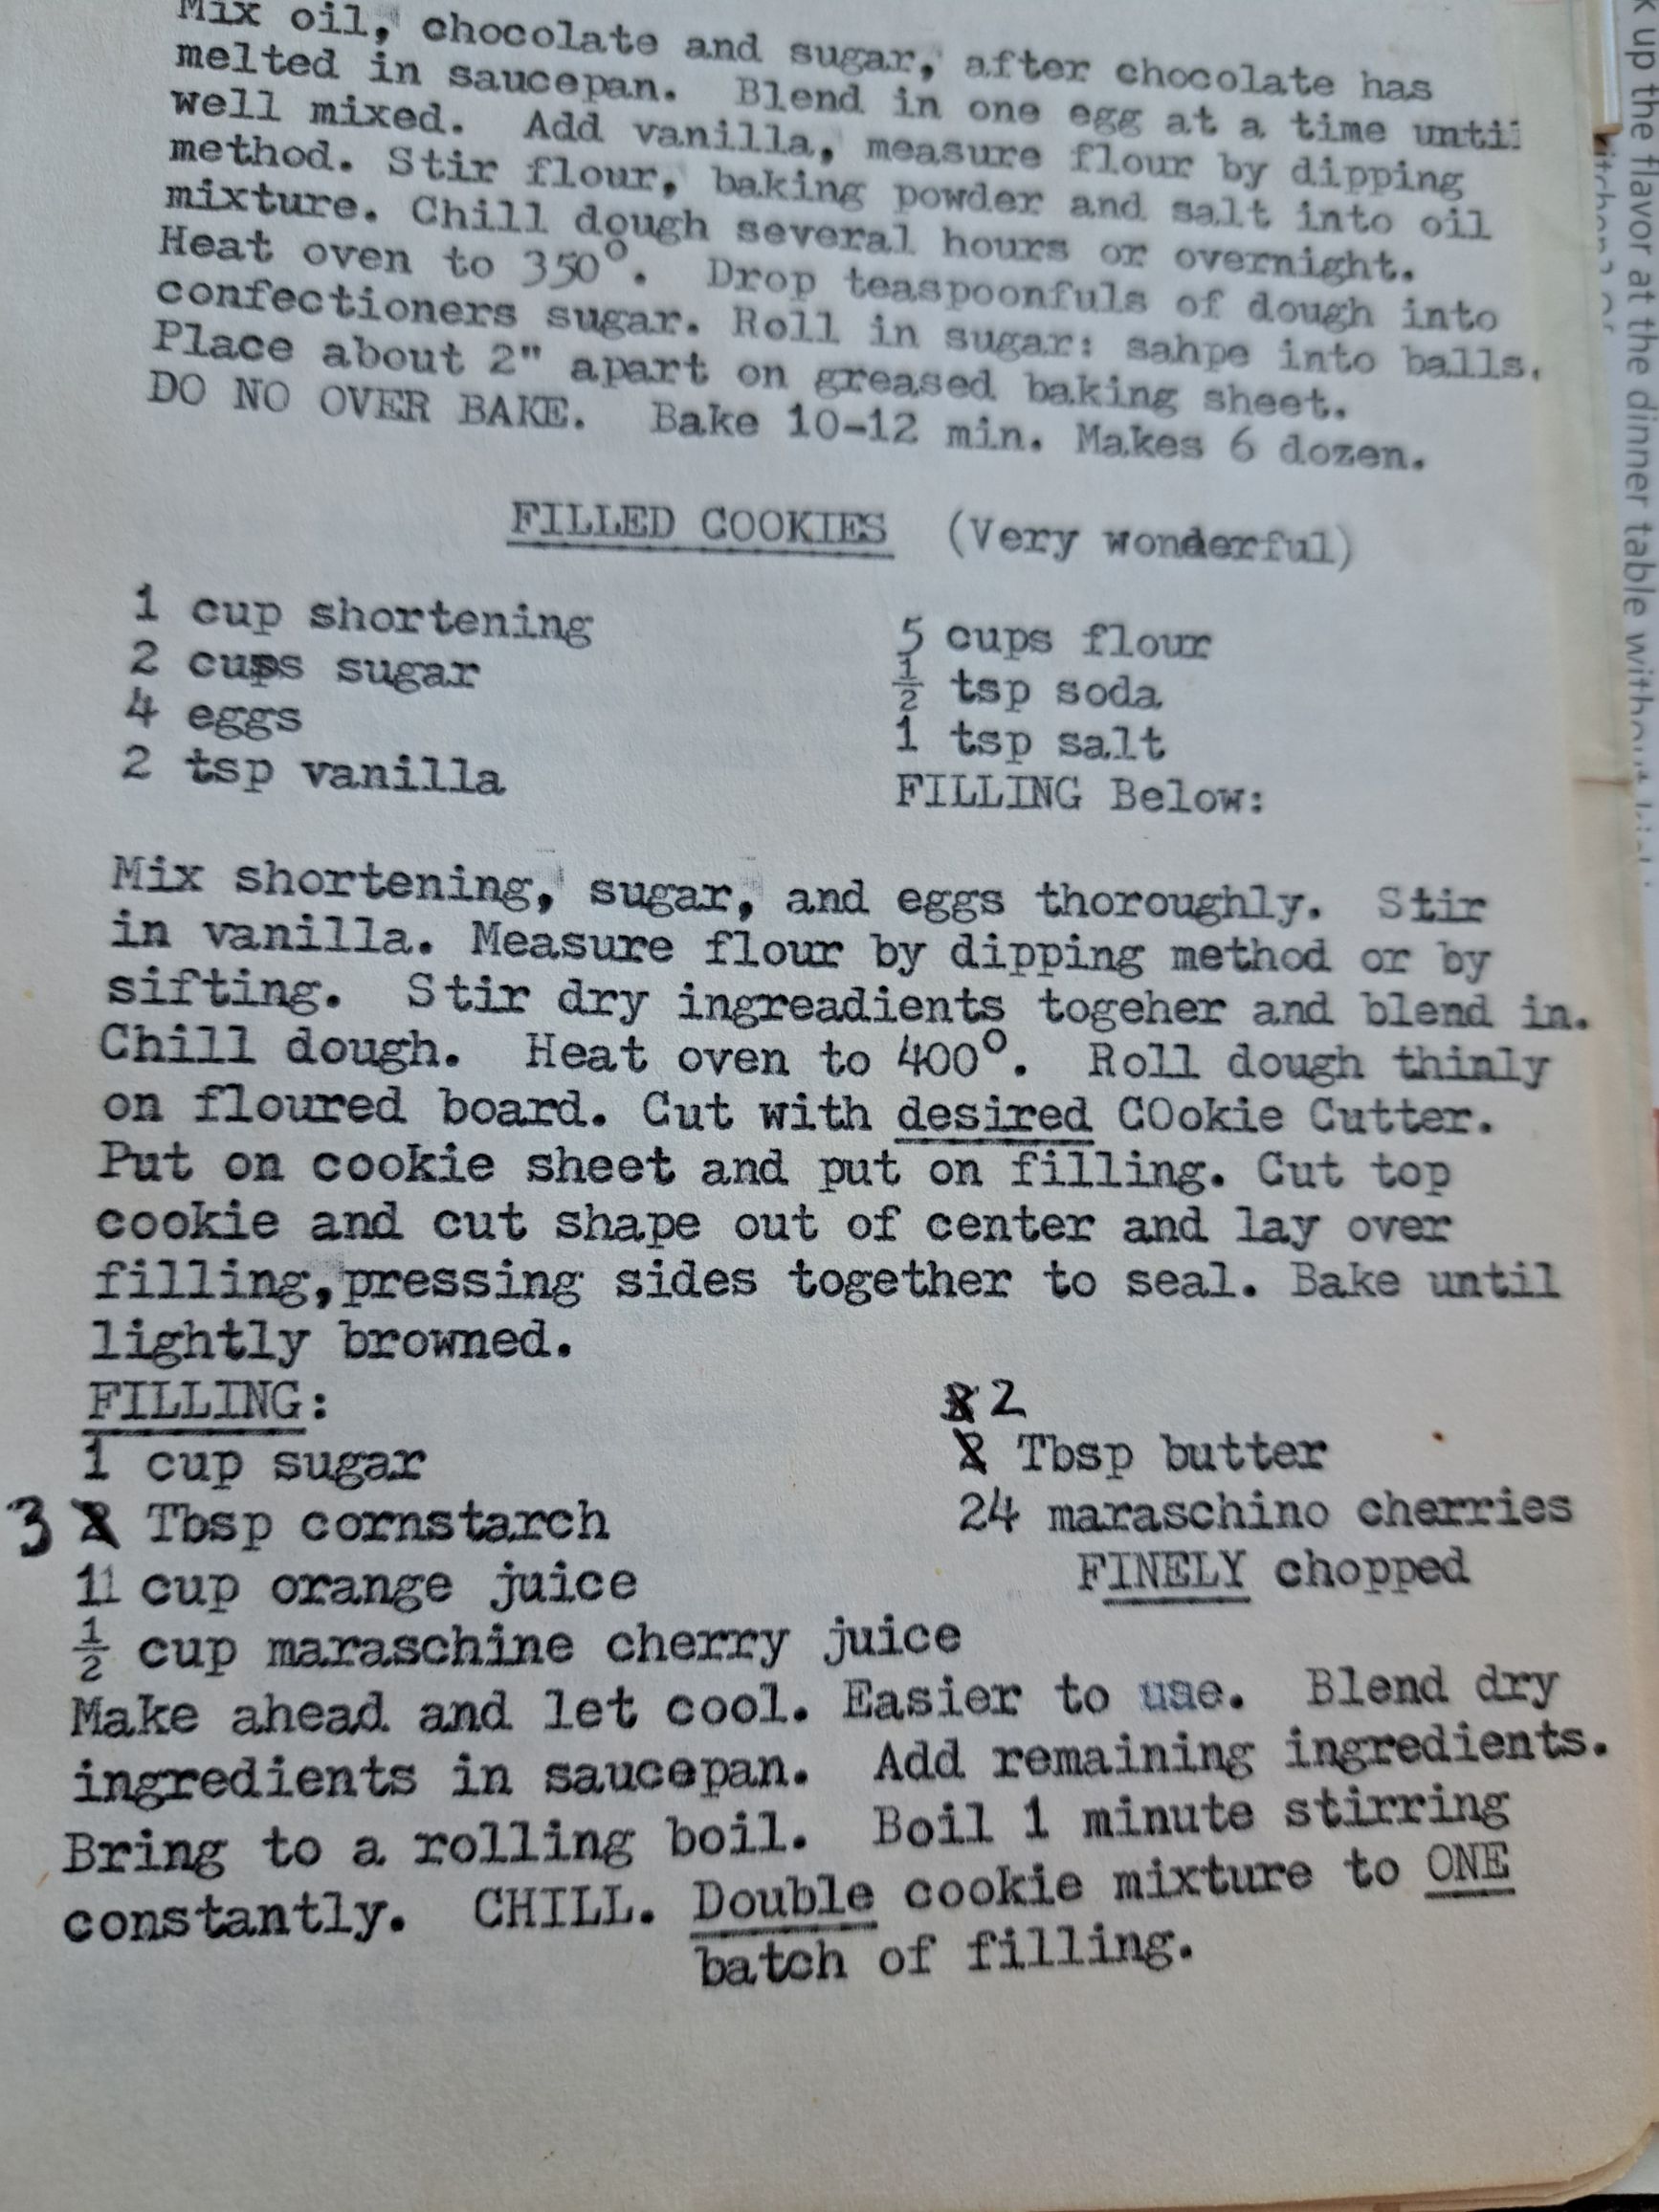
Bottom photo: Original recipe for “Filled Cookies” typewritten by my mom.
These Poinsettia Cookies hold a special place on our family’s holiday dessert table. Our mom made them for the first time to take to a cookie exchange. Even though these cookies are a bit “fussy” to make, it was worth the effort. She thought anyone who made No Bake Cookies were slackers. (You would have to know our mom.) Once we tasted how wonderful they were, they became a family favorite. In our family cookbook, my recipe contained a typo, unbeknownst to me. The amount of cornstarch was incorrect! I had made several failed batches of the filling and essentially gave up making the cookies, relegating the baking to our brother, Don. A couple of years ago, quite by accident, I found a scratch piece of paper in a section of my cookbook that was written by our Grandma Everts with the correct amount of cornstarch and I was vindicated! We all had a good laugh about it and I still get ribbed from time to time. As you can see from the picture of Don’s cookies, he uses a different cookie cutter but the delicious results are still the same.

This is a picture of the “OG” poinsettia cookie cutter that our mom used. These cookie cutters (or similar) are available from Etsy or other cookie/baking supply sites, including Amazon.
I hope you make these cookies, whether for the holidays or even Valentine’s Day. Despite being a little fussy to make, they are truly delicious. Enjoy!
Ingredients for the Cherry Filling – Note: make this filling ahead and let it cool completely
- 1 cup sugar
- 3 TBSP cornstarch
- 1 cup orange juice without pulp (commercial juice such as Tropicana is fine)
- ½ cup maraschino cherry juice
- 2 TBSP butter
- 24 maraschino cherries – finely minced
Ingredients for the Cookie Dough – Note: Make two batches of this dough because a base and a top are needed for each cookie.
- 1 cup shortening
- 2 cups sugar
- 4 eggs
- 2 tsp vanilla
- 5 cups all purpose (AP) flour (plus more for rolling out the dough)
- 1/2 tsp baking soda
- 1 tsp salt
Special Kitchen Equipment Needed
Stand mixer is recommended for the cookie dough
Poinsettia shaped cookie cutter – can be found on Etsy, Amazon, etc. OR you can use any shape that you desire
Plastic straw (to cut 3 holes in the top of the cookie so the cherry filling shows through)
Directions for making the filling – Note: this filling can be made a day or two ahead and refrigerated before making the cookies.
- Blend the dry ingredients in a heavy-bottomed 2 quart saucepan.
- Add remaining ingredients and stir to combine.
- Bring mixture to a gentle rolling boil.
- Boil 1 minute, stirring constantly.
- Remove from heat and let cool completely before filling the cookies (easier to handle)
Directions for making the cookie dough
- Mix shortening, sugar and eggs together thoroughly.
- Add vanilla.
- Measure flour by dipping method.
- Mix dry ingredients together with shortening, sugar and egg mixture until just combined. Do not overmix or the dough will become tough.
- Chill the dough for 10 minutes or so to make it easier to handle.
Directions for cutting out and filling the cookies
- Preheat oven to 400 degrees Fahrenheit.
- Roll cookie dough out thinly on a floured surface.
- Cut out two pieces of cookie dough for one cookie.
- Place one of the cut out cookies on the cookie sheet and place a scant teaspoon of the filling in the middle of the cookie. These do not spread out so you can place the cookies fairly close together to bake.
- For the top of the cookie, use the straw to cut 3 holes in the middle of the cookie.
- Place the top cookie onto the base cookie, making sure that the edges of the top and bottom cookies match. Then lightly press the edges together.
- Bake in the oven until just lightly browned on the edges, about 8 minutes. Do not over bake. Who wants a brown poinsettia?
- Let the cookies cool a couple of minutes on the cookie sheet before removing to a wire rack to cool completely.
- Store in the freezer in a flat covered, air tight container. Layers should be separated with some waxed paper. These cookies will thaw pretty quickly once put out on a platter and will magically disappear once family and friends discover how delicious they are!
